October 31, 2011

Halloween 2010 Mini Album.. sneak peek

I finished a paper bag mini that I have been working on for a few weeks, and I want to share it.. but pictures just do not do it justice! I plan to record a quick video of the album soon, but until then here is the cover (minus some gold glimmer mist that I added at the last minute).
I used the paper bag album setup from Kathryn at Life on the Scrap Beach . The only real change is that I closed up all of the "pockets" except for the last page. I did not have enough pictures to use the pockets as well.


First Christmas Gift Done!!

I have actually finished a Christmas gift! I made this with the intention of giving it to one person (and I am not sure if she reads my blog...) but might give it to someone else actually! I found out that another person on my Christmas gift list loves purple, and I am not sure that the originally intended recipient still does. I will make another version for the 1st person though!
All supplies are Papertrey Ink except for the patterned paper that is from my stash (and a couple of years old...)


The small pocket on the inside cover will hold stamps...
and I will include a card or two in each pocket as well..

October 27, 2011

Seashore

Another Disney Cruise layout using the TwoPeasinabucket 4X6 Photo Love course by Shimelle Laine. This time I used the August lesson.. and I LOVE it!
I used the same papers and techniques as I did in my other Disney Cruise album pages

This is what you see when you first look at the page in the album:
And a closer look:  

But when you turn the page you see...

I love this!!! I trimmed the page protector for the first page down (after I had the pages made) and sewed them together on the "stitch" line. I also added a little glossy accents to the ends of the stitching to make sure that it does not come out. I love how many pictures I got onto "1" page. The original sketch used 8 pictures, but I fit 11 on mine!  
Here are the close ups of the inside parts of this layout.

I cut the title on my Cricut using the  Life is a Beach cartridge. I covered it with Zig 2 way glue and sand. I love the texture of the mesh, shells and sand on this page!

Supplies used in my 2011 Disney Cruise Album:

October 14, 2011

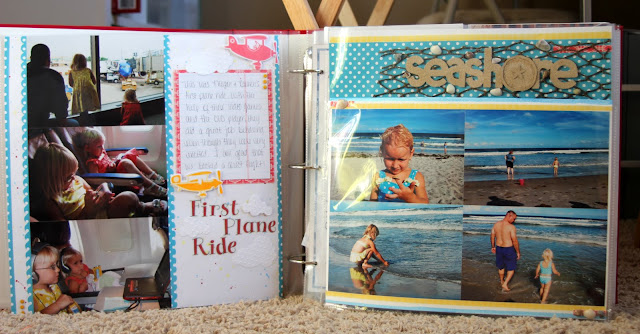
First Plane Ride

Here is another layout that I made for our Disney Cruise 2009 album. This trip was not only our first cruise, but the first time that the girls were on an airplane! The papers are from the same DCWV stack and the sketch that I used is the March 4x6 Photo Love sketch, just rotated 90 degrees. I die cut and stamped the planes and clouds from the PTI Fly Away stamp set and the Cloud 1 & 2 dies. I embossed the shapes with the cuttlebug dot embossing folder and used SU Dimensionals to pop up some of the clouds and the planes. I used the same paint/ shimmer spray splatter technique as I did on the cover page.


Supplies used in my 2011 Disney Cruise album:


October 5, 2011

Amanda's Birthday Card - 2011

My sister is an amazing crafter, and not just papercrafts. She crochets, quilts, makes jewelry, fused glass.. you name it, she can probably craft it. So of course making her a birthday card is not a simple thing. I have to make a really good card!
I saw this card
                                                                  Source: forum.papertreyink.com via Kelly on Pinterest

on the PTI forum and knew that I wanted to make something similar. I had this adorable glittered paper (I think it is DCWV) already out on my table from another project and I loved the turquoise in it. Amanda's favorite color is blue so I knew that it would work.
As I was gathering my supplies I ran into my first problem. I could have sworn that I had the PTI Star die used in my inspiration card.. but apparently not. So I had to dig through my dies to find another shape that would work. The label from the Tea for Two (I think that is what it is called) set seemed to work the best.

Then I ran into my second problem.. I wanted to cut the die out of both pieces at the same time (obviously) but did not want them adhered yet since I still needed to emboss the background. (As I type this out I wonder why I did not emboss the white first and THEN cut out the shape) So it took 3 tries to get everything cut straight. I intentionally off centered the label, but of course did not realize until it was all put together that it was not off-centered enough to look intentional. Oh well.
So I get everything adhered, outline my image with a marker and go to grab my PTI buttons... and realize that I must have missed ordering the Hawaiian Shores buttons. I am not sure how since I typically order the entire color collection at one time... but nope. No buttons. I pull out my blue bin (I really need to post my revamped storage here soon) and luckily I had some bling in the perfect blue.

So here you go.. not as pretty as the card my sister gave me for my birthday this weekend, but it was made with a lot of love (and took entirely too long!)